Have you seen these old Readers Digest books? They are popular right now as decorative accents. I saw a post by
Monika Wright on the
My Mind's Eye blog a while ago and fell in love with her re-purposed use of one as a mini album.
Monika has a tutorial on the MME blog that I followed for my book. {Book Lovers please forgive me for gutting the pages, I will use some of them later.} I covered the wounded area with several patterns of washi tape.
The oldest son of some good friends of ours is getting married soon so I thought I would make a "Our 1st Year Together" Journal for them.
Sheets of 12 x 12 patterned cardstock are cut into different formats
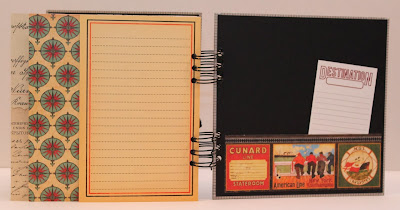
Flat Page: 7.25" tall x 4.25" wide
Side Fold Page: 7.25" tall x 8.25" wide
being scored at 4.25" and then folded forward or back
so inside can be decorated too with room for pictures or memorabilia.
Washi Tape works well to make a Flapper Page, possibly for more privacy.
Remember the original book pages? Adhere three of them together and use them as a Flat Page. This one has a pocket attached --> Love that wood paper
Another Side Fold Page
with a stamp that can be used to personalize the date.
The details on the paper were used as guidelines for cutting.
One of the special things about a journal like this is you can document everyday sorts of things like going to the grocery store or the first time you had your folks over for dinner.
Any sort of horizontal card can be turned into a pocket.
The first year of marriage is a chance to discover all sorts of things about each other such as what would be on your Top 10 Bucket List?
A Flapper Page and Pocket Book page with two inserts.
This page reminds me of a little Dutch door.
Fold Up Page: 12" tall x 4.25" wide
scored at 7.25" and folded up
Pocket Page: 12" tall x 4.25" wide scored at 7.25" and made into a pocket.
I like having a little bit of the tags extending past the normal page edge.
Arrows point the way --> to something more.
I tried to leave plenty of room for whatever pictures, ticket stubs, receipts or memorabilia might need to be attached.
A little sewing to add some texture along with an embellished brad.
A 12" tall x 4.25" wide can be a Pocket Page or
a Fold Up Page
Really like how the chipboard stickers add some interest, color and texture.
Like being able to personalize the journal with all sorts of stamps, tags, colors, papers and embellishments
as well as page configurations and hidden places.
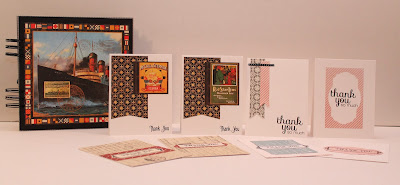
Here is how the back of the book looks with the rings in place.
Thank you Monika for your inspiration and tutorial.
Thank you Jeff for your photography skills and help {& for making dinner}.
Hope the newlyweds have fun filling up this journal as well as looking back at it in years to come.
Supplies Used:
Papers, Brads, Enamel Dots, Tags, Stickers, Washi Tape ~My Mind's Eye
Patterned Paper ~Pink Paislee
Lyrical Letters Cartridge ~Cricut
B99 ~Sketch Copic Marker
Ink ~Hero Arts & Memento
Summer's Best Stamps ~Unity
Smitty's ABCs Stamps ~Lawn Fawn
Journal It-Top Ten Stamps ~My Favorite Things
Readers Digest Condensed Book
1" Book Rings ~Office Depot


